How Simulation Get’s it Right
A Look at Simulation Results for Optimal Split Removal
Cars that carry a certain ‘prestige’ are built to appeal to their buyers through their style. It’s no wonder therefore that in order to be successful on the market auto manufacturers are striving to push the limits of design complexity. Hence, due to more complex part geometries as well as other reasons – such as use of new and advanced sheet materials – the design of a sheet metal forming process becomes increasingly complex. Simulation provides the means by which engineers may deal with such complexity in the process, but the challenge is to ensure that all the requirements are being fulfilled in reaching a successful solution.
If it was down to a ‘trial and error’ approach the improvement would be slow-going and would strongly depend upon the person involved in the job. The engineer could, e.g. modify the binder force value and carry out the simulation again. The simulation results then show whether a workable binder force value was selected or not, for achieving a quality part without splits. If the selected process settings failed to yield a good result then further single simulations need to be run with a newly chosen binder force. This can become repetitive which is why a more systematic solution process is needed. Fast forwards to today and AutoForm has developed a methodology for Systematic Process Improvement.
This Systematic Process Improvement (SPI) entails a standardized way by which engineers may effectively optimize forming processes by identifying which design parameters influence part quality and to what extent. Here the quality output can be aimed towards viewing various target results, e.g. no splits, no wrinkles or sufficient stretching. In this way, design parameters which have the most influence on the stamped part can be identified early on in the engineering stage.
Its essential aim is to reduce the number of trial-and-error loops, grant transparency of various solution statements and allow for transmission of that work to other colleagues. As a result, the development of best forming practices can be reached quickly, is more reliable and less dependent upon individuals, while at the same time eliminating human error.
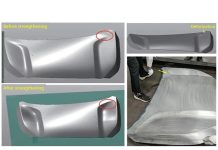
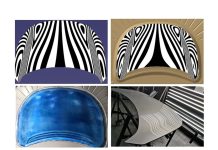
Let’s examine this through one practical example. The picture below shows an inner decklid. The problem occurring in the current simulation is that the result contains split issues. Now our task is to resolve these split issues.

What if these split issues weren’t solved during simulation? The current defined binder force value is 1800 kN. Using the old approach of trial and effort the engineer is faced with parts that don’t always encompass the optimal use of the material. Now he or she must change the binder force, run another simulation, check the result and change it again. This is extremely laborious to say the least. Plus there is no guarantee that this process ever yields an acceptable result.
At some point the user will stop this laborious testing as arriving to the first successful result is considered the best solution, even thought it might not be the most ideal value.
On the other hand the optimization can occur during Systematic Process Improvement.
Here the user has the task to specify some parameters, which in this case is a part without splits. The design variable is then selected, which is in this case the binder force. Its current value of 1800 kN is now considered as the variable which would be between Min = 1000 kN and Max = 2000 kN.
Now the Systematic Process Improvement analysis can be started. The software gets to work running several single simulations (called Realizations) simultaneously, testing out different binder forces and their effect. After calculating the results all these Realizations are available in one simulation file and can be evaluated together. During calculation the engineer can get on with other things without interruption.
Now the software points out the ‘window of opportunity’ allowing the engineer to identify and visualize the process window. The green process window represents “working” binderforce settings, where all splits have been resolved. The red color indicates where split issues will still occur.
The simulation engineer will be entirely guided by the visualization of the process window and can easily examine the binder force settings within the analyzed range. What’s more the result may be seen in 3D view based on the best defined binderforce. For the decklid under question the green process window turns out to be between 1000kN-1240kN that successfully fulfills the required limits.
The final result, with a binder force value of 1100 kN, identifies no more critical areas where splits could appear.

Now the engineer has much more insight into the process, because the Systematic Process Improvement approach makes everything demonstrable. In that way, it is much easier to identify further process improvement potential instead of using the Trial And Error approach, where the simulation engineer would settle for ‘something that works’ as opposed to investigating more. Perhaps there is still a better solution to the current one close to the required limits.
SPI offers a path to reach the most feasible process by proving the ideal range of design variables. This also means helping engineers to deal with more complex part geometries, high-strength materials and even aluminum. High quality demands is where SPI excels. Needless to say all of these results are achieved rapidly and it shortens development times.
In summary the Engineering Department can provide better results, faster results, more reliable results, and results that can easily be reported and communicated.
And the good thing is that starting with R7 each Explorer seat allows the setup, calculation and evaluation of such Systematic Process Improvement approaches, because now this is a standard application in AutoForm software.
Article contributed by: Michael Stippak, Technical Product Manager.





Thank you for this excellent article. Do you preparation example of approach to die-matrice and position of drawbead for aluminium sheet, hss, conventional sheet etc.
Thank you very much! Your feedback is highly appreciated! With respect to the draw bead’s cross sectional profile and shape, we have experienced that many of our customers prefer to stick to their company standards. Therefore, we have implemented an import option for your preferred “standard draw bead sections” from a library. This eases life in the lean tool shop organization. However, you can define parameters – the bead height or the groove radius for instance – as variables for your Systematic Process Improvement approach. This is a powerful feature when you still can virtually introduce and remove material in the design phase. Alternatively, you can assess improvement strategies only removing material from your draw bead cross section to evaluate try-out strategies later on. However, it is clear that you can virtually design, modify and assess any form of section in AutoForm for Systematic Process Improvement. On top of all, talking about the centerlines of the draw beads: yes, you can optimize their position in your given ranges, referring to your proposed centerline sketch in a Systematic Process Improvement approach. Segmenting the draw bead is therefore a supporting tool. All this is possible, useful and widely used. Do not hesitate to contact your support office for more detailed answers examples! – Michael Deuring