Where to Invest Your Time to Reduce Tool Recuts: an Interview
In this engaging interview Volkan Karakus, Senior Application Engineer AutoForm Germany, describes the tryout loop in detail for the first time on our blog. He describes the relationship between the virtual tryout loop, obstacles to overcome and final workshop tryout.
Volkan started with ‘If we are to talk about how to reduce tool recuts we also need to ask ‘what are the desired quality objectives?’ The greatest obstacle in reaching targets which are time and cost based, is that parts do not achieve the desired quality objectives, in terms of being a feasible part to manufacture with the right dimensional integrity and appearance quality. It is largely accepted that of these dimensional integrity is the most important. In the end this is the goal. We would like to have the dies, then do tryout and achieve correct dimensional integrity.
Some things in the process get lost in translation, seeing that the objective becomes getting a green simulation rather than a feasible part. People start focusing on the simulations alone, and in arriving to a green simulation they also assume that they have achieved a feasible part, at which time they move forwards onto springback compensation. Such a user will conclude their results and release them. Suddenly in tryout they come across some problems. In order to overcome the issues they’ll start changing things; such as the drawbeads, the forces or the blank lines etc. Unfortunately what they are doing in such an approach is also changing the dimensional integrity. They are deviating from what they have planned.
Software users will assume that their process is feasible. But perhaps they haven’t solved every issue that has gone into the equation. What if the set up wasn’t done right? What if the material data used isn’t correct? Maybe the material data is only similar to what is being used in tryout. Some are not using the latest material model. Perhaps they are not in contact with the tryout team which leads to miscommunication. In the process customer expectations can get lost in translation. What I’d like to communicate is that the most important thing is to actually do the feasibility following an exact method. That method is perfected in Virtual Tryout.
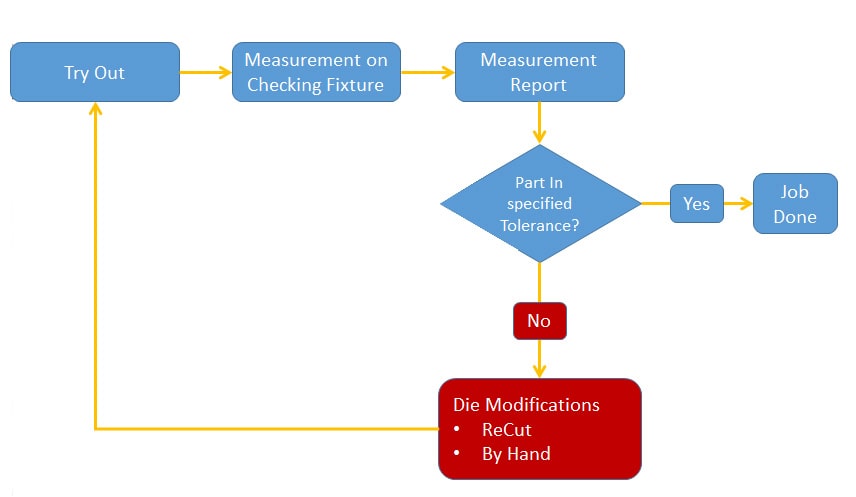
Tryout Loop Workflow
This is a diagram I use for explaining the real tryout loop. It reflects the quality loop that starts after the machining. You continue by completing the assemblies and once assembled it enters the press. For each tryout loop you aim to improve a panel from the dies. Following this you then put this final panel to the checking fixture and you produce the measurement report. This report shows if the part is within the tolerance objectives or not. For example do the matings between different panels work or not? The mating tolerance is generally small (+/- 0.5mm even maybe less). For the non-mating areas (not touching another panel) are measured as well (+/- 1mm). Everything will be checked during the measurement operation. If the part is within the tolerances then the job is done. You only need to complete some final iterations without losing the quality level. Your feasible part is without excessive thinning or wrinkles etc. If however the part is outside the set tolerances then you haven’t achieved your engineering approach. This is where you have to continue your tryouts by hand in the tool shop. If the deviation is too far from the planned tolerances and you perceive it’s not possible to rescue the situation then you have to re-cut.
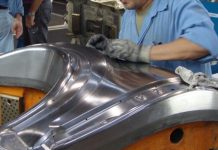
The modifications phase means changing things that can actually be controlled, for example press tonnage, die conditions, location of the blank on the blank holder etc. This involves some polishing and grinding operations. When it’s pressed once again and we may examine whether or not we have a higher quality part. This is the real quality loop. During those modifications challenges arise. And what if you have done several tryout loops and still cannot achieve the tolerances? A tool maker has some leeway in terms of the non-matings. Generally they hand over the die to the customer if more than 90% of non-matings comply. For matings (again generally speaking) 100% have to match for the targeted part, especially for the mounting holes, fixing holes etc. The tool maker must achieve a 100% perfection in terms of being within tolerance here. Now you can see the importance of simulation. There is always pressure from the side of the OEMs to get it right. They expect the very best results.
If you cannot achieve the right conditions at the real tryout then you have to go back to the drawing board and renew your engineering study and update your surfaces according to your measurement report. During this process your goal is to eliminate all of the compromising effects. You then need to recut your tools accordingly. Ideally you will try to stay in a virtual quality loop as much as possible. It’s far more cost effective. The dies as well as the engineering study is affected in the process. Everything is now involved at this point. During this phase engineers will involve several software solutions to run simulations. It must be said that AutoForm-Sigmaplus is often used but it should be employed earlier. When used long before the first machining it can actually drastically reduce the number of correction loops as we saw in this last blog post. The key to understand here is that reality has its own engineering loop during tryout, but in virtual engineering there is also a quality loop, a virtual tryout loop. If doing your engineering studies and virtual quality loops at a high level beforehand then you’ll avoid having to do recuts afterwards.
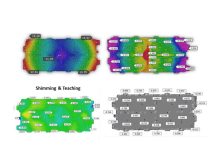
As to how to do this – the steps are: we run our simulations with the data, we do the evaluation, examine the springback effect, do compensation and then again run the simulations to verify it. For each iteration we have to check our parts, to see if they are within the specified tolerance or not. If we cannot achieve the goal then we make another compensation loop to arrive to our target. If everything has been prepared right then one quality loop (in reality) might take just two days. A virtual quality loop includes simulation runs that depend upon computation times, which run the compensation studies etc. This takes much less time than attempting tryout corrections on the floor. An efficient team takes approximately one week to produce the right virtual geometries. In the engineering phase in general there is more time to make changes. The problem is that in real tryout the time is then limited which means engineers need to use the time spent in virtual tryout to their best advantage. In this way they can always make sure everything is feasible, get detailed compensation strategies with exact settings, accurate material files, correct evaluations after running simulation etc. The message is that if you do a more detailed virtual tryout loop then your real-world tryout loop will be shorter.
Pains always occur in realty. In virtual tryout you are not wasting money. The moment you start with real tools then the real cost start accumulating. The cost of one press per hour is around 150 Euros (may be less or more depends on size). This does not include labor for employees etc. I am talking about the running cost of the press. Machining is also expensive and time consuming. Consider that for just the surface machining operations of one mid-size draw die it takes around three weeks to complete. A complete re-machining (only finish machining of Punch and Die) may take more than 1 week. It all depends on how much you change your die of course. To avoid these expensive costs the only way forwards is to focus on your virtual tryout and simulations.
Thanks Volkan for this great article!
New readers, if you sign up to our blog we’ll send you zero marketing emails. You’ll receive just one email per month announcing our top blog posts. If you wish to contribute your own article to formingworld.com please contact us and see our guideline.
*cover photo courtesy of Schuler


