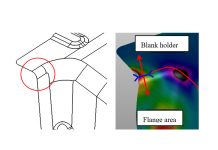
How Royal EG Drastically Reduced Tryout Cost Thanks to Robustness Analyses
[dropcap]I[/dropcap]n this article Chanho Lee, AutoForm Technical Manager Korea, demonstrates a robustness analysis success story with AutoForm customer Royal EG. Before using AutoForm-Sigmaplus their simulations were green, yet still resulted in splits in tryout. A picture speaks a thousand words, see below. This is part two of our Korean Robustness series.
Chanho said ‘In June of 2017, when we visited Royal EG, a major tool and parts designer and manufacturer for leading OEMs. They had a lot of trouble arising from unexpected cracks in the tryout process. We went over the project contents and explained the meaning of Robustness analysis at which time they allowed us to examine their simulations.’
‘The problem was, the robustness analysis showed cracks where no problem was shown at the engineering stage, and those cracks occurred at the same points during the tryout.’

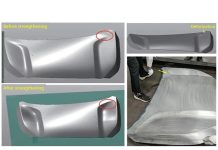
Fig. 1: Comparison between successful engineering
result vs tryout & robustness result.
The above left images show that thinning was not identified during the engineering phase, but in reality a major split occurred. The AutoForm-Sigmaplus robustness evaluation identified this as a problem area however as in the bottom right image.
‘In fact the previous simulation showed the panel should have been within tolerances.’
Chanho proudly said ‘This Sigma result was explained at the meeting with the Royal EG’s chairman, president and executives. It was unprecedented and surprising situation for the simulation engineers. Recognizing the effectiveness of the Robustness analysis through the first verification, Royal EG asked again for a second verification of another part.’
A second part that was experiencing a lot of difficulties during tryout at the time was then selected allowing AutoForm to be put to the test. The pictures say it all:

Fig. 2: Comparison between successful engineering result vs Tryout & Robustness result (H220BD 1.0t, 96 realizations, FV, 32 cups, 15hrs)
‘Again a crack was found at the same position as tryout’ said Chanho. ‘Because of the serious crack occurrence they had already changed the shape and milled again several times, but it was not possible to overcome the cracking issue, at which time they finally requested the part design be changed, but, fatal to the part, it was already too late.’
‘Therefore, it was again confirmed that the necessity of performing the robustness analysis at the early stage of tool development would have reduced the number of Tryout loops.’
After the second validation Royal EG executives confirmed a need for AutoForm simulation, finally signing the AutoForm-Sigmaplus contract undertaking robustness checks themselves.
The analysis of this project concluded as follows:
- The preparation time for Robustness analysis is very short, because the standard file can be applied and anyone can use it easily without special training. In fact, with a few clicks the AutoForm-Sigmaplusrun can be started and in a few hours a lot of information can be used.
- Most Sigma runs can be completed within 12 hours or up to 24 hours.
- The advantage of a robustness analysis is the reducing of the waste factor (excessive tryout times) in the actual tool shop.
- A successful single simulation does not always guarantee the success of tryout especially with high tensile steel parts. Therefore the robustness analysis is growing in popularity.
Thank you Chanho for these fantastic images and results.
Readers, don’t forget to sign up to our blog. We’ll never send you marketing emails. Once a month we send out a single email showing our top three post for the month. You can stay informed as AutoFormingWorld becomes the number 1 sheet metal forming blog.


