Everyone Loses Out When Surface Lows Studies are Neglected
In addition to a robust finished product, car and other consumer product manufacturers have to be extremely diligent about delivering a flawless and appealing exterior. A lot of work goes into ensuring that the visible outer Class A panels on each car are void of any noticeable surface defects.
Unfortunately, the part may be manufactured with certain defects, such as sink marks or “dips” on a surface that should be entirely smooth. These surface defects can occur for various reasons, including: convex surfaces being interrupted by unwanted concave zones, bending moments (door handle), zones of different plastic strain / thickness (door handle), and accumulation of material (B-pillar – roof frame). Defects are typically located in somewhat curved areas, several cm in size. In tryout, these surface defects are detectable using physical grinding stones or visual systems. But is there a better way?
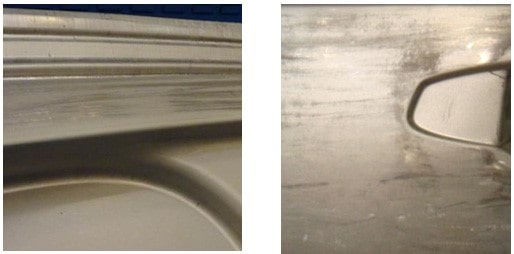
Figure 1: Surface defects on a door, inner (left) and outer (right) panel
Not all defects are immediately visible, often requiring light exposure to detect. They become far more visible after the panel has been painted, which is a serious issue. If the blemishes can only be noticed after painting at the OEM assembly plant, the problem is far too late to fix. In many cases, the parts have already come in from the supplier and in the worst cases, the car body has already been assembled and painted.
Consequently, someone is to blame! Often it’s the OEM supervisor, who neglected to check the panels once they were delivered. He may in turn blame the subcontracted stamping facility that sent the faulty parts. The resulting knock-on effect is that the OEM will effectively blacklist the manufacturing plant that failed to produce quality surfaces. Receiving flawless Class A panels is extremely vital, so no further contracts will go to that supplier. It’s also a sore loss for the OEM, coming to the realization that they don’t have the means to properly check surfaces of received part-orders.
In order to prevent this problem, OEMs should take the additional step of digitally inspecting the panels before the parts have even been produced by their supplier. This is possible because manufacturing plants can share simulation files, no matter their location. Of course, tool and part makers should complete this step as well; their future contracts are on the line. OEMs should do it as a matter of quality inspection.
AutoForm has developed result variables and recommendations for obtaining results that match the actual panel in tryout. In terms of the Class A surface evaluation, AutoForm has a result variable that mimics grinding on the panel with stones as well as some additional visual systems.
Here are the three available approaches that can be used:
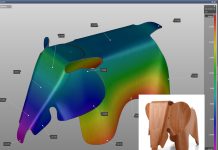
- Curvature study: A curvature study colors the part’s geometry based on the surface curvature. The color scheme is shown below in an example curvature study. This easily identifies curvature differences, narrowed down to areas on the sheet.
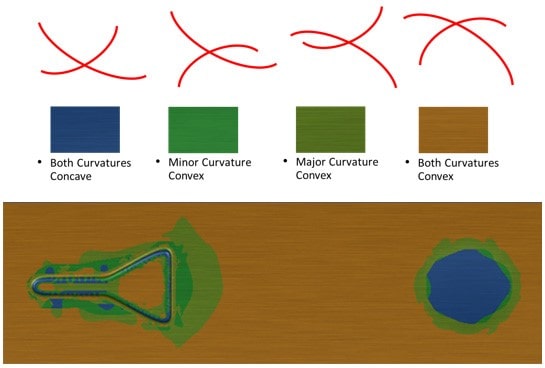
Figure 2: Curvature study on the tool geometry compared to the formed sheet
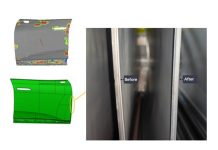
- Depth-gauge indicator study: This is a digital representation of a real measurement gauge used in engineering, sometimes called “three point gauging.” It typically has two supporting pins and the center point slides along its guiding rail, as shown below. The objective is to evaluate the direction of the sink marks and understand the severity of the defect in that direction. This lets the user know the worst direction for stoning the panel when searching for defects in tryout. The yellow lines depict convex shapes while the blue lines show concave shapes.

Figure 3: Depth gauging tool and application on a door panel
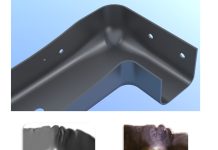
- Surface lows study: This study compares the shape of the sheet after springback with a specific reference geometry. This is done by selecting a virtual stone of desired length and a direction for grinding on the panel. This direction can be obtained from the three point gauging with the most concave curves. It is worth mentioning that AutoForm has an “Automatic Direction” setting, which delivers results examining all eight directions. The surface lows study accounts for the direction with the worst results.
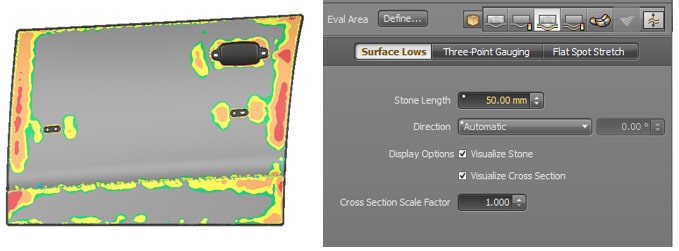
Figure 4: Surface lows evaluation with stone length 50mm
Every company has its own standards and methods to evaluate surface defects based on tribal knowledge. We offer our own AutoForm recommendations for using these result variables to accurately predict surface defects. First, detect sink marks by comparing the resulting geometry using a curvature study. Second, check the direction and extent of the sink marks using a virtual three-point gauging tool. Third, check the curvatures before and after springback to determine the curvature changes caused by relaxation. Lastly, apply virtual stoning with the appropriate direction and stone length. Repeat these four steps for each operation.
Ultimately, the analysis can save OEMs lost time and the pain of receiving faulty parts. For tool and part makers, this means protecting the security of future contracts with large OEMs.
Feel free to contact me for a demonstration.
Karan Bhise, AutoForm USA


