A healthy simulation is the one that considers the real parameters as input and boundaries so that the tool can be built accordingly. In this interview Karan Bhise, Application Engineer at AutoForm USA, offers a refresher for readers on keeping their simulations healthy. Are you skipping any of the necessary steps? Let’s find out.
Karan said ‘In going towards the end goal of a green simulation one shouldn’t overlook the practices of a healthy simulation. That means not skipping any of these steps, not ignoring any of the warning messages, and knowing what you are imputing. There are many selections and warning messages that may arise while setting up the simulation and after computation. If you simply ignore any of these warning messages as they come up, in a rush to reach a green simulation, then the related issue will show up during tryout with its negative consequences on part quality. But then it’s too late.’
Here are the five steps to a healthy simulation:
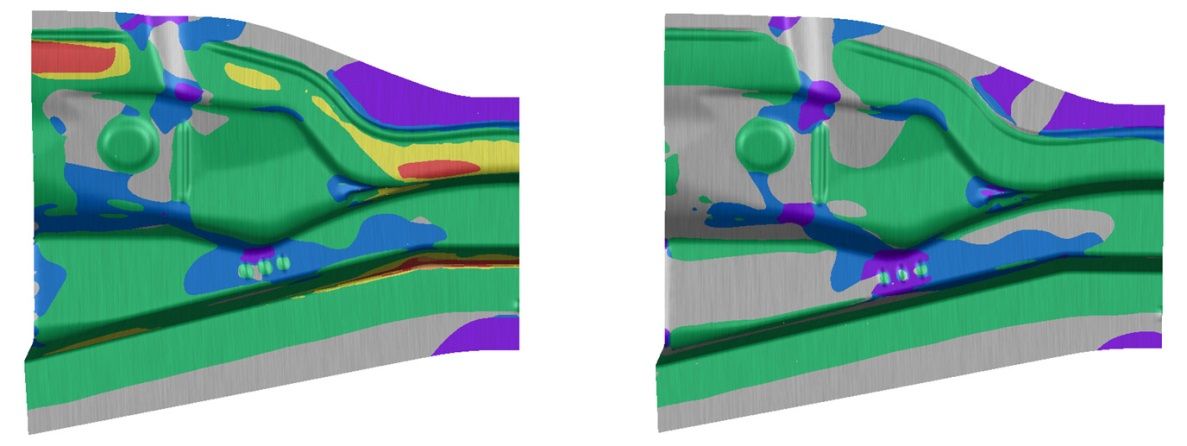
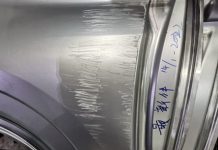
Fig 1: Left shows splits but it may be a healthier simulation.
1st Support: Accurate Representation of the Die line and Process Parameters
‘What happens when you only use the default values within AutoForm?’ asks Karan. ‘The answer is that your simulation might not coincide with what you may have on the floor. The accurate representation for both the die line and process conditions includes the gap between the tools, the tonnage used etc. and all of this needs to be accurate. Even though you may get a favorable result you still must be certain that what happens at the press matches exactly what has been simulated. This is why a simulation showing splits (Fig 1.) may be a healthier simulation, as the issues it identifies are reality.’
One other user tip: you cannot work with a tool gap which is less than the nominal sheet thickness. For example if the sheet is 1mm you cannot have the tool offset at 0.7mm. This would lead to convergence issues/an unhealthy simulation.’
2nd Support: Accurate Representation of Material
‘The second support to a healthy simulation concerns selecting the material you are using. The material library is updated in our patch releases. Selecting the exact same material might not always be possible if the manufacturer is using alternative materials. It is always possible for users to create a material file for AutoForm. In fact this is a responsibility. Testing must be done and a material card must be created to match what you have on the floor.’
Even after creating a material file from a tested material, the results between reality and simulation may vary. The reason for this being variations in material thickness, grain direction and other such parameters that may vary from coil to coil. In order to tackle this issue and obtain more accuracy, users can make use of the SIGMA module which is more than just an optimization tool within AutoForm. This would help add all such varying parameters as noise variables to obtain a more accurate result bringing us closer to reality
See our article here on material cards for more information.
3rd Support: Adequate representation of tool geometry/mesh
AutoForm is a Finite Element Analysis tool and needs an accurate representation of the tool and sheet geometry in the form of a mesh. As far as AutoForm is concerned, it uses shell elements in the mesh which cannot be changed. However, it is necessary to have the right relationship between the tool and the sheet mesh to obtain accurate results.
In AutoForm, there are defaults set for the mesh settings. These defaults are based on test results and have seen to provide accurate results most of the times. These default settings assure that the tool mesh is finer than the sheet mesh. If the sheet mesh becomes finer, it will capture all the geometry irregularities as part features. If an inaccuracy in results is seen between AutoForm results and the part formed, it is necessary to evaluate other parameters mentioned in this article before changing the mesh settings( to be done under the guidance of AutoForm application engineer).
4th Troubleshooting Warnings
‘Once the simulation is done there are still a few things to do before examining the simulation results itself. One of them is to review if any warnings have appeared on your simulation. If there is a warning, it is necessary to go back and fix the warnings even before looking at the results. There are some who try to avoid this, instead choosing to skip the warnings, as they believe that perhaps the results cannot be trusted due to these errors. Yet, if you go ahead and examine the results and skip this crucial step then AutoForm cannot do its job. In other words, those who carry out this bad practice will get results that are not in accordance with reality, even when matching all other input parameters; those results simply will not be reliable.’
‘Now you might get the ‘increment calculation did not converge warning.’ This is one of the warnings that absolutely must be fixed. Of all the warnings it’s the most troublesome because it means the calculation did not converge within the maximum iterations (relative equations were not solved).’ this scenario may occur for different reasons which may be:
- Excessive splitting.
- Excessive wrinkles.
- Bad tool geometry.
- Improper locating of the sheet.
- Tool gap in areas below nominal sheet thickness.
- Tools travelling too fast.
- Numerical.
Karan then said ‘If there is a conversion issue fix it based on these points. If you can’t fix it then contact AutoForm. In our experience the users who ignore these warnings are pressing too hard just to reach a green simulation. This rush-like behavior will show up in tryout, and then it’s too late. The key is to trust AutoForm and use these warnings to benefit real-world metal forming. The software is telling you what’s wrong for a reason. Whatever you have imputed creates your reality for AutoForm. The overview I’ve given here covers the essentials. There are selections every user knows, such as what tonnage they are using or what the press stroke is, or the cushion stroke for how much the tools move. These are not defaults and need to be added by the user. If you don’t know what was selected then later troubleshooting will also be difficult.’
5th Springback Compensation
There is another important piece of information for those who use AutoForm for springback compensation. We want to tell users that it is not recommended to rely on a springback calculated based on such a simulation that is full of warnings or where result shows splits or wrinkles. The reason for this being that one wouldn’t compensate a geometry unless it is a completely safe ready-to-use panel as well as the fact that one would prefer compensating the geometry that represents reality as much as possible. Hence the prerequisite is to fix all the splits and wrinkles that you see. So first achieve a healthy simulation. Then get to a green simulation. Thereafter you can start looking at springback.
In going towards the end goal of the green simulation one shouldn’t overlook any of these healthy practices. In other words, first work at a healthy simulation and then work towards the green simulation. That means not skipping any of these steps and knowing what you are entering. There are literally thousands of selections. The overview I’ve given here covers the essentials. There are selections every user knows, such as what tonnage they are using or what the press stroke is, or the cushion stroke. These are not defaults and need to be specified by the user.’
New visitors, don’t forget to sign up to our blog for a once per month update on the latest industry insights. We’ll never send any marketing emails other than metal forming simulation blog posts.


