Hello! I’ve put some of my posts together as a simple handbook for automotive designers and engineers working with vehicle body structures — whether you are a fresh or experienced engineer.
I hope you enjoy the reading and keep in mind that body structures engineering, besides being fascinating, is fast-paced and quite dynamic. So keep learning every day and do your best to share your experiences with your teammates — this is a good way to learn and grow your skills.
Before we begin, I want to quickly explain the real meaning of the word JUST in body structures engineering and manufacturing. Let’s consider a few examples based on common requests:
JUST need to move this hole about 5mm
JUST need to shift the side wall 3mm inboard
JUST need to add one new hole at this part
JUST need to change the size of this hole
JUST need to cut off 1mm of this flange
These are common requests for a BIW structures engineer, before, during and after the vehicle launch. And that’s okay, it’s all part of standard business operations. Remember:
The BIW structure is a donor system, and its main function is to support other vehicle system interfaces.
But, never forget that JUST behind a simple hole, there are many interfaces to consider, such as:
- Die tooling set (tandem/transfer) or couple stages (progressive)
- Dies, punches, blank holders, binders, gas springs, bolts
- Control gauges, welding fixtures, clamps, grippers
- Sourcing, timing, logistic flow, part number tracking
Thus, bear in mind that even for a simple hole change, you always need to check the entire production chain to avoid build issues.
In inexperienced hands, a single hole change can STOP the manufacturing line and/or the entire vehicle build altogether, if not managed appropriately.
For me, there is no simple BIW change; each request requires my full attention, no matter the product stage. So always keep your eyes open, especially when you get a call to change the design starting with the word JUST! (post link)
We always talk about interfaces when designing and manufacturing a vehicle system, even more so for BIW structures (a donor system). And, besides being quite important, the interfaces generally inform the final decision about the design strategy, and sometimes the body architecture.
But what exactly is the interface? To put it simply, every single part and vehicle content in juxtaposition to your entire assembled part, whether directly touching or with a certain clearance, it all counts, including all manufacturing processes and required tools. Scary, right? Think about your fridge, every shelf has its own space, volume and packing limit, besides the fridge itself defining the available space, and all the parts are added in.
One thing is clear for everyone working in automotive — many parts are needed, along with the dozens of steps to complete a single unit, which is when all system interfaces take place. Remember when you tried to put something in the fridge but had no space available? Here we go.
To properly manage this complex workload, we essentially split the system interface into two main analyses:
Design system: Checking all part to part interfaces, considering dynamic and static clearances including system function and related engineering deliverables.
Manufacturing process: Considering all production steps, including the tools for bolting, welding, loading, installation and ergonomics, along with production constraints around painting, body shop and final assembly.
A good example of system interface is the front fenders. We need to manage the design interfaces with front doors, hood, body side, front structures, head lamps, fascia, arch liner, tire envelope (and more), besides the manufacturing process of handling, loading and bolting the parts, including power tool access.
So, if you are designing a single part, always keep in mind that your part is never alone. Thankfully, we are not talking about ghosts, but rather some other systems and processes close to your part — so you don’t need to be scared, just watch out!
Bear in mind that the fridge you are working with often changes, so you JUST need to find a way to fit everything you need inside, in a way that makes sense. (post link)
Just another important heads up before talking about design techniques – Engineering changes validation.
I believe there is a common condition for all OEMs: ongoing design changes. There may be various reasons but at some point during the vehicle life-cycle, certain part changes will be required. Another factor is also generally present: the production line can never stop. Well, it can stop, but never during the time planned for mass production — salable unit outputs.
So, everything needs to be made with high attention and well synchronized with all stakeholders to ensure the part replacements won’t affect product quality besides manufacturing line schedules — and this is when “winter is coming”.
Well, we already know that JUST doesn’t exist when we are engineering and manufacturing parts and BIW systems, and the same applies when we need to make product changes. Well, it doesn’t matter if JUST a raw material or gauge changes — change is change, so we need to treat the new parts as “unknown” in the current production chain until we have a high confidence level to replace the current parts with the new ones.
The main reasons we often change the design:
- Part commonality among new models
- Cost reduction or design efficiency
- Process and product improvements
- Design correction (yes, sh*** happens)
So, to ensure we can survive the “winter”, we run some validations before proceeding to permanent part replacement at the production line. For example, to replace the material grade or downgauge a part, we often follow a few validation steps:
10 parts for initial stamping validation
30 parts for stamping and system function
150 parts for system and vehicle validation
The pain point is, we need to run all those validations without affecting the current production (facility and supplier), kind of like replacing the driver of a vehicle at high speed. Up to now, we have only been talking about part validation, which means we still need to run some vehicle testing to ensure the right quality and attribute deliverables (we can talk about it afterward).
Only after we successfully complete these try-outs and system validations can we proceed to permanent implementation at the shop floor and lines, which is another complex workload. It’s important to point out that the production validation depends on the severity of the change, part complexity and system function.
But, one thing is certain: JUST is never the case. (post link)
How important is it for body structure engineers to understand the sheet metal stamping process?
For me, it is quite important and even necessary, which is why this is always my first advice to fresh engineers starting their careers in the body engineering office. I’m not saying that you need to be a stamping expert, although it would be helpful if you were, but it’s necessary to have some knowledge about the forming process, sheet metal methods and especially the manufacturing constraints.
My point is, to drive a sheet metal part design, you have to at least understand how it’s made. On the other hand, how can you explain to someone how to bake a good cake if you have no clue how it’s made?
On top of this, you’ll face issues during the development phases that demand major design changes, and you need to be able to analyze and provide feasible solutions.
Do you know what springback is? How to control and fix it using design or process? Believe me, this is just one constraint you will encounter designing a sheet metal part, and YOU need to be able to drive the issue resolution, with or without support from stamping mates and toolmakers.
Bear in mind that the nice colorful CAD models on your computer screen are just the beginning. The parts have to be manufactured, and all upcoming steps related to process and manufacturing are also part of the product design. Yes, the product engineering workstream ends up only at the shop floor.
What are the main differences between progressive, tandem and transfer die processes? Stamping and roll forming? Cold and hot forming? How does the process affect the design?
The stamping process also affects your part costs and quality, sometimes also driving the product design, and you need to understand how to provide a proper solution and deliver a feasible design from the first sketch.
On the other hand, you must lead the bakery! (post link)
So, here we go — how do we design a sheet metal part to deliver a good body structure performance?
Well, if you are looking for a single magical response, I’m afraid to tell you that this answer doesn’t exist. But don’t be scared, there are certain design best practices that often help to achieve the expected body structure performance and avoid potential issues. Did you clock the word “help”?
No matter the vehicle architecture, there are always two “bad guys” following the design: stress and strain.
Of course there are others, but let’s say these are the primary hurdles, especially when we’re working to deliver the main structural attributes. The point is, some attribute issues we can manage by using a different material grade and thickness. But the shape also plays an important role in achieving the target and should also be part of the solution, even more when we are working to deliver durability and safety performance.
So, here are some of the key points to consider as design best practices to help you mitigate potential performance issues, avoiding stress risers and concentrators around your design:
- Always use the largest radius possible, including the bending radii. Don’t forget the mating surfaces surrounding your parts. Don’t use sharp corners in any square holes, notches or slots. Besides hindering performance, the toolmakers will hunt you before rejecting your design.
- All design section transitions should be smooth, tangential and gradual. Avoid abrupt section changes if you don’t want to end up with cracks after durability runs.
- Do your best to not design multiple stress riser features in the same surface plane. I know, sometimes we have no other option due to other system interfaces.
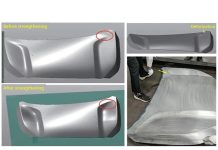
- Add beads and darts only when required for stiffness or springback control. Around these little features, the bad guys are waiting for you to crack your part.
- The joint and spot weld distributions are also quite important to balance the tensile loads around the parts and systems. Always consider sharing the stress around the parts by improving the joints.
Bear in mind that from virtual to real phases, we may have some correlation gaps, meaning even though some issue wasn’t found during virtual analysis, that doesn’t mean it won’t appear during physical validations. That’s why you need work to mitigate potential issues in your design from all directions. The best way will always be to release the design considering avoidance of stress concentration points for all parts and joints. This will help you save money and timing, if you’re thoughtful about it from the first sketch. (post link)
Design efficiency — what does it mean when we’re engineering the BIW structures?
Efficiency: this word is passed around in all companies whatever the industry, and for me it makes sense. Well, this is the best, if not the only way to keep the business profitable and growing.
Put simply, being efficient means delivering high quality products in a short time and with low cost — obviously using mass production.
But, how can we achieve this? It looks simple, right? It’s only three elements.
The point is, to deliver JUST these elements (time, quality, cost), there is a long path to travel. So, from the body structures side, we consider a mix of engineering, manufacturing, vehicle performance, style and the main one, customer experience. Everything combines to deliver those three words.
So, here is a short list reflecting the overall view during the engineering and manufacturing phases regarding the work related efficiency of the body structure development:
- Regulatory and internal requirements
- Customer experience and expectations
- Appearance (styling and craftsmanship)
- Package and occupant interface
- Durability and reliability
- Vehicle dynamics (NVH, ride and handling)
- Manufacturing and assembly feasibility
- Costing, weight and financing
- Interface with other systems
Yes, we need to work to balance all those inputs/outputs and constraints to deliver an efficient design. Can we achieve 100% of the target for all these deliverables? Not always, but we always work hard to deliver the best profitable business case. On top of all these deliverables, we also need to work upfront to manage the life of the vehicle, including maintenance, serviceability and repairability, and the associated costs. We often consider a warranty of ten years or a minimum of 150,000 miles, considering several environmental variations and customer usage conditions.
Besides all the above deliverables, these are the main functions expected for the vehicle body structure, divided into groups:
- Defining shape and appearance
- Installation of other subsystems
- Protection from the environment
- Managing energy during a crash event
Bear in mind that, for each bullet point, we may have a couple tasks, workloads and interfaces to manage, depending whether the architecture is made using sheet metal or aluminum material. (post link)
What is punch direction? Another definition that needs attention from the initial sheet metal parts design and stamping process definition.
BIW parts often have a couple holes, each one with a specific function. The main ones are: locating, clipping, gun access, joint clearance, anti-rotation feature and weight relief.
But I would like to point out the importance of the clipping hole quality — highlighting the interface with interior trim, exterior ornamentation and wiring systems. After the stamping process, being more specific about the piercing stages, the part gets some burrs around the holes. This is a normal and an expected result, and is in fact inherent of the process.
Basically, opposite to the punch direction we will always get burrs, and if it was not under quality control, this will directly affect the clipping operation during the assembly steps.
The best way to mitigate such issues is by defining the punch direction in your design, keeping the punch and clipping installation direction the same. However, this is rarely possible due to process constraints, in which case the hole tolerances have to handle it. There is acceptance criteria for burrs including cutting edges, and this is also part of quality inspection and BIW deliverables. (post link)
What are design triggers? A simple yet sensitive feature applied to manage the body structure loads.
Increasing the part strength doesn’t always improve the vehicle performance; the body system has to be balanced and developed to manage all load inputs. Sometimes, weakening some areas improves the overall structure’s performance, and the triggers have important functions on this workload.
The main function of triggers is to drive the body system behavior and support the complete vehicle structure, manage and absorb the load inputs – kind of uses. The front bumper beam assembly is a good example application.
It’s quite a complex system to develop; it must be strong enough to receive the frontal impact but also able to absorb and manage the load paths into oncoming vehicle structures. A load path with a frontal impact may affect the A pillar performance, for example, and that’s why we need to work out how to manage this path from the first input, the bumper beam.
It’s a very complex and sensitive engineering trading, and the triggers are key features to support this achievement. But simply adding triggers doesn’t mean we can easily manage the loads and deliver the expected results. There are many other inputs to consider until we achieve the target; the triggers are just one. (post link)
What are design gaps? A helpful strategy to support the BIW manufacturing phases.
Considering all geometric and process variations, one of the main challenges during BIW assembly steps is the marriage of parts. Certain constraints are already expected based on the part geometry and assembly tolerance stack-up previously identified during GD&T and virtual analysis. But the process variations are still complex to manage in a physical environment, which means even if we do the home work very well, we may still face some unexpected issues.
The last thing we want during manufacturing roll-out is a BIW assembly issue with no option to handle by tuning the welding fixtures and locating parts.
Yes, sometimes we have no option and/or no other part quality to assemble, so we need to keep going until we find the root cause and improve the part quality. This is real life on the shop floor!
So, based on design architecture, we can predict and mitigate some potential issues during the assembly steps by adding margins into the design as possible fixe — hence why we often use this design gap strategy. The strategy is more about manufacturing lessons than math. As a simple example, take a single part with over three mating surfaces to marriage. If you already worked with GD&T, you may understand the potential concerns, on top of adding the shape complexity and sub-assembly interfaces.
The point is, sometimes we have no option to design the interface another way, so we need to ensure the part will fit properly during assembly steps, considering the worst case scenario but still with proper quality and under control. The design gap strategy has some limits and parameters, which is part of manufacturing sign-off prior to product release.
It’s not just a matter of creating clearance among the parts; you still need to weld those surfaces without affecting the joint quality or appearance.
This is a simple example of product engineering working with eyes on the manufacturing process. And for me this is the best way to design parts, define processes and deliver proper manufacturing quality. (post link)
What is flutes design? A simple design strategy to support BIW deliverables without losing structural stiffness.
Never forget, the BIW assembly is designed to support functions and attributes — every single hole, flange, forming, and shape has a specific function to support the system interfaces and complete the vehicle deliverables.
So, if you are working for body engineering, you MUST know your system very well— what it means, understanding why, how and when each detail is added to every single part.
Back to flutes design, this is a simple design strategy basically considering in keep-off some surfaces among flanges to create gaps between mating surfaces. It’s a good strategy once keeping the whole line flange increases the part stiffness — the last thing we want to lose in the BIW structure. We often use this design strategy to support BIW deliverables, for example:
- E-coat ingress and regress: the flutes are used as drainage features, mainly in closed sections like x-members and beams, and most of the time are quite helpful to achieve the e-coat drainage target without affecting part function.
- Squeaks and rattles: a root cause of BIW squeaks and rattles is metal to metal contact, so adding the flutes design among certain flanges, mainly in areas of high torsional behavior, might help to mitigate rattling, for example in B pillar flanges. But don’t be so happy, squeak and rattle issues come from ghosts.
- Welding joint stuck-up: sometimes, to increase the structural stiffness performance, we need to add extra welding joints, so we use the flute design to create mating surfaces across flanges so we can place the spot welds or rivets.
The main advantage of using the flutes design strategy is that most of the time, we can maintain roughly the same part stiffness, as keeping the flanges with flutes instead of adding notches often doesn’t create design triggers among the parts, weakening the systems.
So, whether you need to add some e-coat drainage feature, mitigate squeaks and rattles or create a new welding joint, never forget to first try playing flutes; most of the time it works. BUT, never forget to check stamping feasibility too! (post link)
What’s escalope flange design? A smart way to deliver the BIW weight target while maintaining the part function.
Weight is one of the most important vehicle deliverables. Besides being related to inertia class and emissions, it also affects the vehicle performance and is part of the body engineering achievements. The design has a weight target and as you know, the BIW is the biggest vehicle system, which means a greater weight contribution.
Not a problem, every BIW engineer knows that we’re always facing issues and challenges. Believe me, achieving the weight target is a complex task, especially when we need to improve the structural performance by adding parts or increasing the sections or gauges. It’s a complex design trade with no option to fail — no matter how it happens, the vehicle weight must be delivered.
To help with this achievement — considering the BIW is overweight — we often use a design strategy called escalope flanges to reduce weight.
This strategy consists of simply reducing the final shape of the parts by cutting off the material along the flanges not used for welding joints.
It sounds simple, but it’s not. Before applying this design strategy, certain interfaces need to be considered, such as static sealing application, stamping feasibility, welding fusion area and the overall system performance. Removing material often means reducing part stiffness and adding the escalope creates triggers along the flanges, so this strategy often plays against the structural stiffness. Sometimes, we also use this design strategy to improve the stamping feasibility by removing wrinkles or thinning areas from the part design; this is not the best option, but sometimes it’s the only one we have. The main focus is always the final part shape working on the overall BIW system.
Bear in mind that by using the design escalope strategy, downgauging or reducing the parts section, the BIW weight target needs to be achieved; the same goes if the weight is under target. (post link)
What about sharp edges? A very important design rule that can’t be forgotten during engineering phases or virtual manufacturing sign-off.
As a body structures engineer, one thing that you MUST know about the system is that all external edges of sheet metal parts are like a samurai blade. Yes, anytime you need to grab a part with your hands, use proper gloves and always do so with careful attention. Never forget this!
Knowing that burrs are inherent to the cutting and piercing stamping process, we follow certain acceptance criteria to control them.
It’s not only about hand injuries; the burrs can affect part marriage, corrosion protection, systems installation and attributes too.
Besides burr control, we also have some engineering rules related to sharpening edges considering manufacturing phases, mainly for final assembly steps with manual installation. Basically, for all open windows or slots at structures that we may need to access by hand during the system installation, we need to avoid direct contact of sheet metal edges with the operators’ hands and arms.
Even under control, burrs don’t avoid the sharpened edge condition, which is critical apart from injury risk for operators. Safety first, always! So, to avoid risk of injury, we simply flange all hand accesses (slots) into the BIW structure to avoid the operator touching any edges during the assembly steps; all sheet metal part edges bearing a risk of injury to the operator MUST be avoided. The good thing is, flanging the slots often helps to improve the part’s stiffness.
So, put simply, we mitigate hand injury to the operator by reducing the BIW weight and maintaining the system stiffness. Always try to use the design challenges to bring about advantages for your systems. The vehicle requirements often don’t change, so it’s just a matter of finding the best way to deliver. Keep this in mind. (post link)
Last but not least, always ask yourself: Do I really need to add these features to the design?
This simple question — posed at the right time — can save money and time when engineering sheet metal parts. It isn’t rare to see sheet metal parts with oversized designs — beads, pockets, flanges or even holes added with no real need. I get it, I really do! It’s a normal “mistake” when we are designing a new part using an existing design as a reference. Well, if someone added these features before, let’s keep them all — right? WRONG!!!
I’m not saying that you won’t need to add the same features to your new design; I’m just saying that you need to understand the technical reasons BEFORE adding any features. Just because someone made this before, doesn’t mean you’ll need it too. I know you’re probably thinking, How will I know? Well, I already redesigned a couple sheet metal parts, not only for BIW architecture, and removed plenty of features from the previous design, delivering a clean and cheaper design BUT keeping the same system performance.
Yes, it’s possible, and I’m not even Harry Potter. The most commonly used feature with no technical motivation is the beads across bending lines. We often use these beads for springback control along with stabilizing and stiffening the side walls, but only when the system really requires it and we are facing spring issues in stamping simulations with no other option to control it. It isn’t necessary to add beads to every single bending line.
The point is, adding features into sheet metal design often increases the part and tooling costs. The more features, the more complex the die sets will be, besides taking a long time to manufacture.
Yes! Even a few beads across the bending line might increase the tooling and part costs. If you have any doubts, just imagine how to design the blank holder and die interface with or without beads. Another common oversized design is excessive thickness. Kind of – Well, not sure if we’re going to meet a little bird or a big lion to cross this jungle, so let’s carry a gun to protect ourselves from a T-rex.
A thinner sheet needs lesser stamping forces, smaller gas springers or springs, smaller punches and dies, and OFTEN means cheaper costs. So, here is a tip for you: Always start a new design as clean, simple and flat as possible. After starting the stamping simulations, attributes and function analysis, then is the right time for adding features, and never before! A clean and simple design doesn’t mean it is not functional.
Parts are designed to deliver functions. If there are no technical reasons to add a feature, don’t do it!
I used to say that this is the main difference between knowledge and experience. It’s not only about knowing the design techniques, but how and when to apply them. I learned this once upon a time, and now I’m sharing it for those who might find it helpful. (post link)
Who is Daniel Perez?
Just a guy who loves the sheet metal world, mainly related to vehicle BIW structures, and is always looking for new techniques, software and processes that challenge the status quo.

Daniel Perez | BIW Launch Leader | Senior D&R Body Structures
https://www.linkedin.com/pulse/what-biw-launch-leader-does-daniel-perez/


