Bringing Digital Engineering to Reality Sees Panels Within Tolerance in the First Tryout Loop
Over the last years, Chinese OEMs and tool shops have built up knowledge to master the art of aluminum panel stamping to meet the demands of increased light weighting. However, many companies in China are still facing challenges and require 6-10 tryout loops to reach quality targets and a robust production. In this project, Push Mold, AutoForm and Forming Competence Haage teamed up to engineer tools for a robust production of high-quality A class aluminum hood inner and outer panels for Changan PSA’s (CAPSA) new premium model DS X83.
AutoForm China teamed up with Forming Competence Haage and Chengdu Push Mold to make both panels from aluminum using four operations for this project.

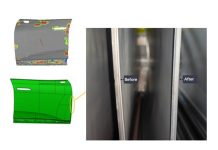
Fig. 1: The aluminum hood outer is produced in four stamping operations
The team built an accurate digital model of the real stamping process, considering all critical aspects according to the AutoForm Accuracy Footprint, as show in the overview below. This forms the base for a meaningful simulation that is capable of predicting and solving issues reliably before they even occur on the real shop floor.
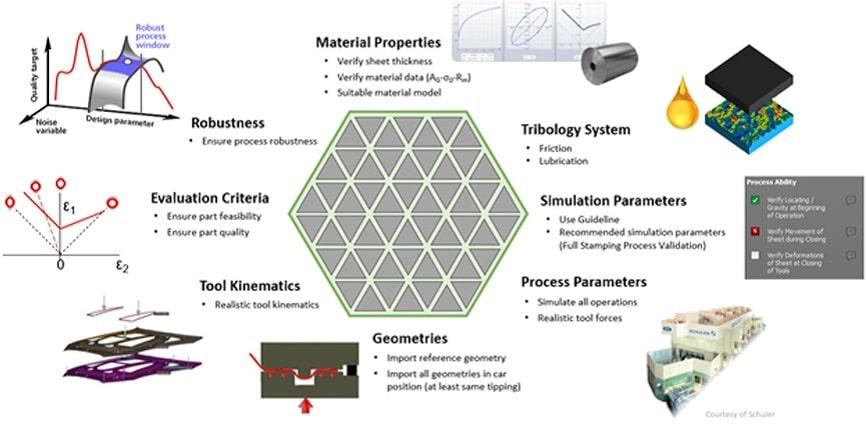
Fig. 2: The digital process model represents all process aspects according to the AutoForm Accuracy Footprint
In the first stage of process engineering, we used the material card provided by the material supplier, Kobelco. In a later stage, Push Mold conducted their own material tensile tests, so that we could refine the material model to be consistent with the real material batches. For the friction model, we applied a realistic tribology model considering material flow velocity, pressure, and tool and sheet roughness over the time of each stamping operation.
The main challenge was to handle the high springback that occurs in aluminum panels. The team simulated the springback of all operations and virtually tested several alternative springback compensation strategies in order to identify the one that was actually bringing the panel within tolerance.

Fig. 3: The compensation strategy
Before compensation, the springback magnitude of the hood outer was between +2.6mm and -3.5mm. By applying the compensation strategy shown in the picture above, we could bring the virtual panel into a tolerance range of ±0.3mm.
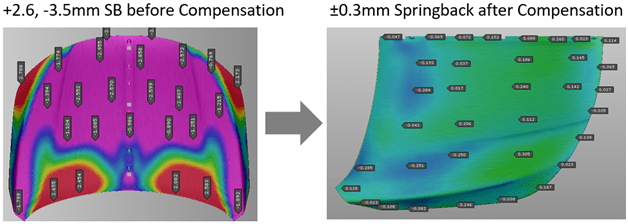
Fig. 4: The springback was predicted and compensated in the digital engineering phase
The tool surfaces were manually re-built according to the compensation strategy validated by AutoForm in order to meet highest class A surface quality requirements.
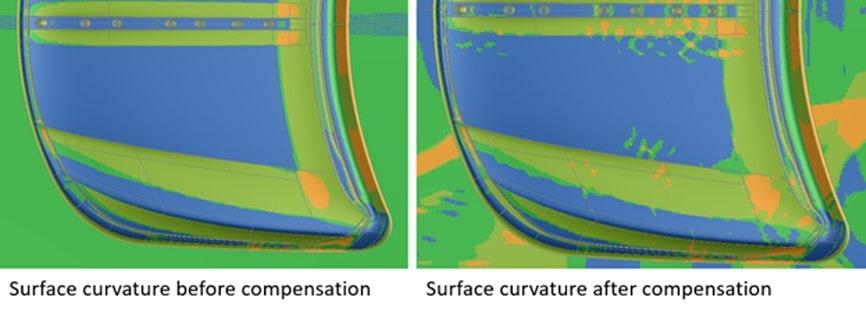
Fig. 5: The surface curvature was compensated then rebuilt in CAD to meet the highest A class surface quality standards
Next, the digital process model was replicated one-to-one in reality on the shop floor with the greatest possible diligence. A proper polishing and spotting of the dies ensured a smooth material floor and uniform pressure distribution, which had to be consistent with the friction and pressure values validated in the digital model. The spotting was improved until the material flow and draw-in were in line with the simulated results. This preparation work was essential to ensure consistency between the digitally engineered process and the manufactured tools. Without this consistency, the simulation would become meaningless and we could not expect to reach the same results.
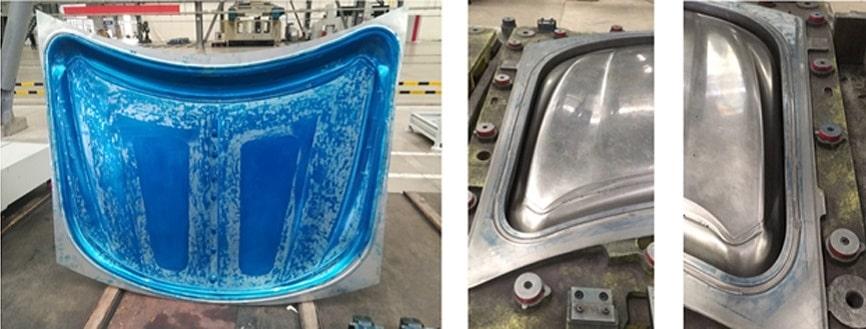
Figure 6: Uniform distribution of the paint shows a good spotting level
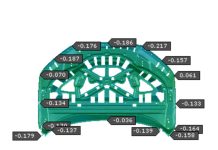
In the first tool tryout loop, over 80% of the hood outer measurement points were inside the desired tolerance of ±0.5mm, with ±0.3mm in the edge area for hemming and a maximum of +1.1mm in the center of the panel. No re-cutting of the draw die was required in this project.
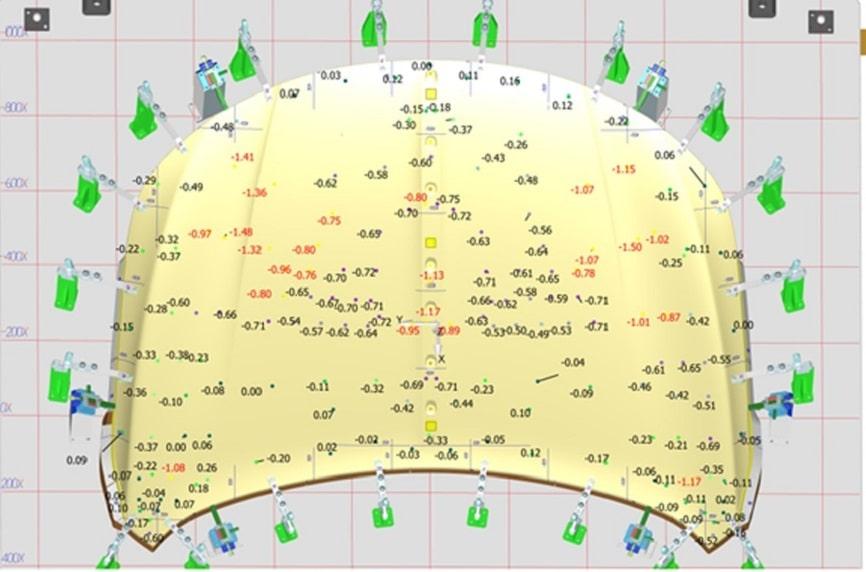
Fig. 7: Over 80% of the measurement points were inside tolerance in the first tool tryout loop
Christoph Weber, Country Manager China at AutoForm, said: “Many OEMs and tool shops in China still struggle to handle aluminum. Even experienced tool shops may take 6-12 tryout loops for aluminum A class panels. With this project, we could demonstrate how to deliver good panels and a robust process from the very first tool tryout. The secret of success is to follow our best-practice workflow, taking the time to engineer a smart process plan, building an accurate digital process model and executing it with the highest diligence on the shop floor, to stick as much as possible to the engineering intent.”
According to Cheng Ke, Vice GM at Chengdu Push Mold, “This project was a success. Over 80% of the hood outer measurement points were inside the tolerance in the first tool tryout. This demonstrates that we have the methodology and expertise to handle A class aluminum panels.”
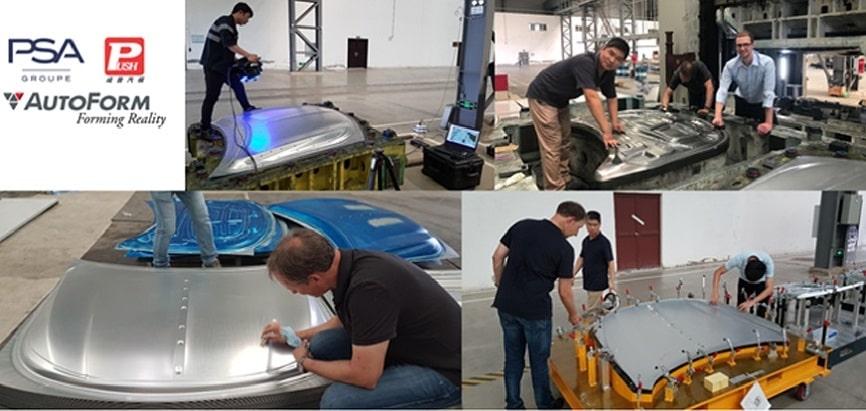
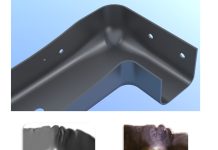
Fig 8: Tool spotting, measurement and correction work during the tool tryout
Push Mold in Chengdu has built a powerful reference in the market with this project, which has allowed them to increase their market share as more and more local OEMs are replacing mild steel closures with aluminum for the purpose of light weighting.
Thank you Push Mold for this great feature post and for new readers, don’t forget you can sign up to our blog to stay informed.


